Of course there are many chain-harness tutorials out there. Those I have seen are just the same, simple design that can be easily found in stores.
This tutorial has a bit of a naughty side, as this design is inspired from a pattern seen in bondage rope.
I won't tell you what chain to purchase, that is to your taste. I would have used a matte, gunmetal chain but all I had was a shiny, silver colour curb chain from a multi-strand necklace that I took apart. Whichever chain you choose, make sure your jump rings will fit through the chain links, some jump rings are thicker than others so make sure your chain links will be compatible.
(I am a size petite-small, so if you need it a bit longer or wide, just measure out your torso and chest to adjust accordingly, as this is the main area where the chain wraps around.)
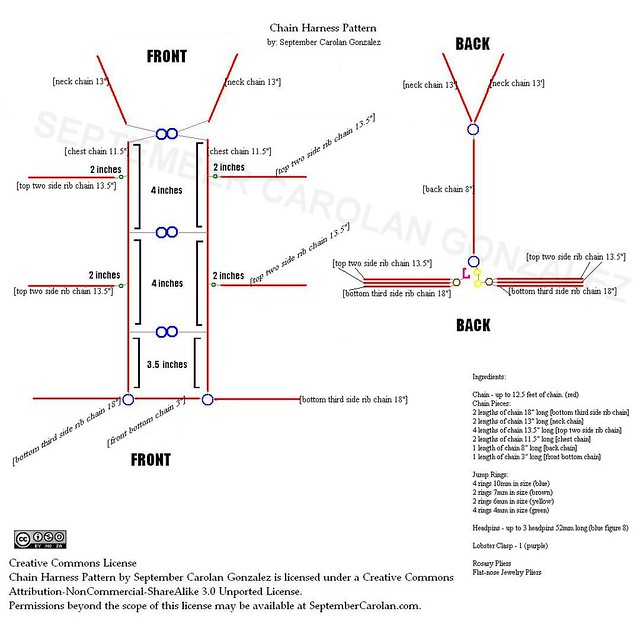
Below, I have a "pattern" for this harness tutorial, I call it a little "cheat sheet" this will accompany the written instructions.
The colours in parenthesis next to each item correlates to the pattern.
*If the photos are too small, click on them, they will open up in flickr where you can view a bigger size*
---
Ingredients:
Chain - up to 12.5 feet of chain. (red)
Chain Pieces:
2 lengths of chain 18" long [bottom third side rib chain]
2 lengths of chain 13" long [neck chain]
4 lengths of chain 13.5" long [top two side rib chain]
2 lengths of chain 11.5" long [chest chain]
1 length of chain 8" long [back chain]
1 length of chain 3" long [front bottom chain]
Jump Rings:
4 rings 10mm in size (blue)
2 rings 7mm in size (brown)
2 rings 6mm in size (yellow)
4 rings 4mm in size (green)
Headpins - up to 3 headpins 52mm long (blue figure 8)
Lobster Clasp - 1 (purple)
Rosary Pliers
Flat-nose Jewelry Pliers
A thick or heavy sweater on a plastic hanger or a body form
Table or flat work surface
Towel or soft surface to lay over work space or under "model"
---
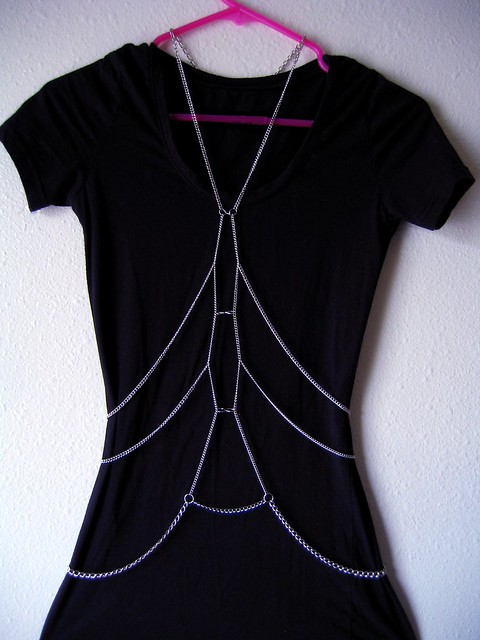
This harness can be easily put on and taken off, there is a minimal pattern on the back of the harness to allow such convenience.
You will need to set up your work area. Hang up the sweater for your "model" to build the harness on, or a body form as well as prepare your table workspace with a cloth or thick soft surface (this prevents any ring or piece of chain to bounce off your table if you so happen to drop one by accident while working--it will happen)for the beginning steps of the harness construction.
Also, prepare your chain and jump rings, it is best to open all your jump rings, have your chain lengths measured out, "cut out", and ready to attach. Have your headpins wrapped and formed prior to building your harness, this allows your work to go by smoothly without having to stop everything to open a ring.
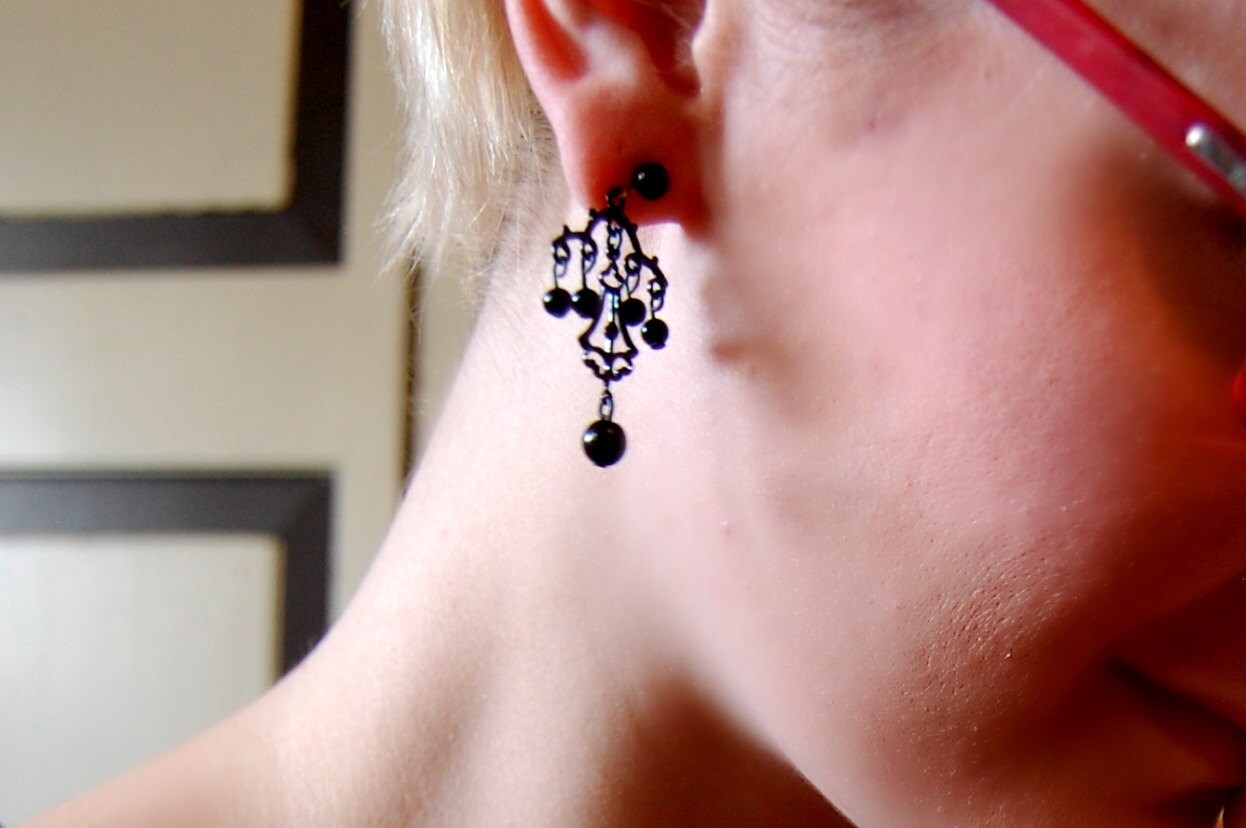
As you may have noticed, I am using headpins. These are for wrapping them into figure-8 jump rings. The flat heads are cut off and the pin is wrapped to a figure-8 shape with a width between 5-10mm (whichever you can manage)
It will look something like this, the photo shows it in an open state. In reality, the figure-8 jump rings I made are far from perfect.

---
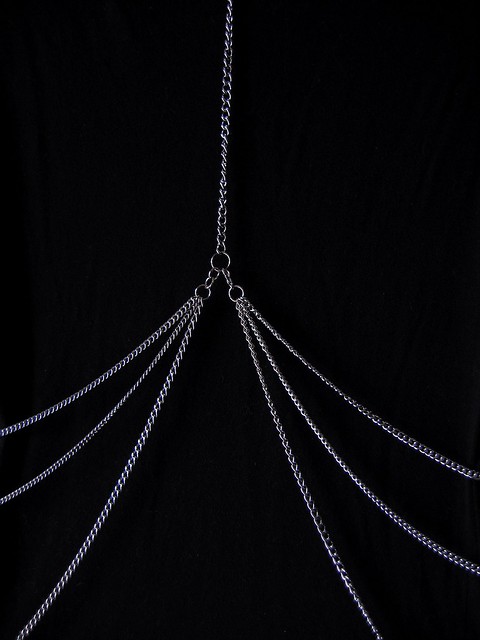
There is a lot going on in the visual pattern, so we'll start at the top of the Front.
---
First, get the two lengths of Neck Chain that is 13" and attach one end of each chain to a figure-8 jump ring.
Second, attach the two lengths of Chest Chain that is 11.5", to the figure-8 jump ring that already has the Neck Chain.
Third, measure two intervals of 4" from the top of each Chest Chain, this is where the other two figure-8 jump rings will be placed, place each side of the figure-8 jump rings into the 4" placement of each Chest Chain. The rest of the bottom chain, should be 3.5" on each chain.
Fourth, measure two intervals of 2" from the top of each Chest Chain, this is where the Top Two Rib Chains that are 13.5" will be placed, attach each Top Two Side Rib Chains into the 2" placement of each Chest Chain with a 4mm jump ring.
Fifth, attach a 10mm jump ring into the bottom of each Chest Chain, between these two 10mm jump rings, attach each end of the Front Bottom Chain that is 3" long, to the 10mm jump rings. To the same 10mm jump rings, attach one end of the two Bottom Third Side Rib Chain that is 18" long.
[*This completes the Front portion of the harness.*]

---
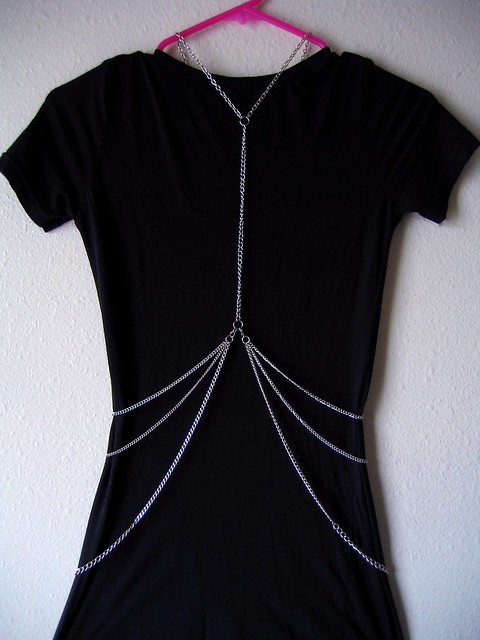
(With the Back portion of the harness pattern, Neck Chain, the four Top Two Side Rib Chains, and the two Bottom Third Side Rib Chain are shown as a continuation in the Back portion of the harness pattern)
Back portion of the pattern, at the top.
Sixth, attach the two ends of the two pieces of Neck Chain (that is not attached to the figure-8 jump ring) to a 10mm jump ring. To that jump ring, attach the Back Chain that is 8" long. To the bottom of the Back Chain, attach a 10mm jump ring.
Seventh, gather, from one side each, all the Rib Chains, and link the ends of each Rib Chain, in correlating order of top-middle-bottom to a 7mm jump ring. To only one of the 7mm jump rings that has all Rib Chains, attach a chain of jump rings as follows: 6mm jump ring-to-6mm jump ring. Attach the bottom 6mm jump ring from that chain and attach to the 10mm jump ring that is already attached to the bottom of the Back Chain.
Finally, of the gathered Rib Chains on the opposite side, attach to the 7mm jump ring that has the Rib Chains, a Lobster Clasp. The Lobster clasp will clasp onto the 10mm jump ring that is attached to the bottom of the Back Chain.
Now you have a cute and naughty chain harness you made on your own! Yay!
 Chain Harness Pattern
 by
September Carolan Gonzalez is licensed under a
Creative Commons Attribution-NonCommercial-ShareAlike 3.0 Unported License.
Permissions beyond the scope of this license may be available at
SeptemberCarolan.com.